Do you dread the unwanted peeks of streaking onto your perfectly painted walls? and want to know Is Primer Supposed To look Streaky ? Are you dismayed by streaky primer coats?
Read further to find out all the answers and tips for painting streak-free walls with primer!
Is Primer Supposed To Look Streaky
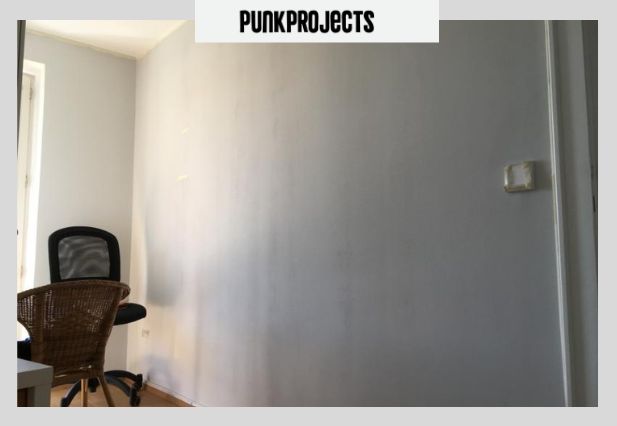
NO! When applying primer, it’s important to ensure that there is an even and consistent coat of product.
Depending on the type of primer used, the finish can vary from completely flat to a slight sheen. Primer should not be streaky and unevenly applied, as this can cause issues with the topcoat.
The goal of primer is to provide a uniform basecoat for painting onto wood surfaces. A streaky finish indicates that you may need to apply more coats or use a different product altogether. This will help you get a smoother look and make sure your paint goes on evenly and with fewer brush strokes.
It is also important to make sure that you’re properly preparing your surfaces before priming them as this will make a huge difference in how well the primer adheres to the surface; any dirt or debris left behind can ultimately show through in the finished product.
If your priming job does turn out streaky, you may need to sand it down and start again with new primer. With the right preparation and proper application techniques, using primer correctly should allow for an even topcoat with no visible streaks!
How To Fix Streaky Primer?
One of the quickest and easiest ways to fix this is to use a roller or a mini foam roller to even out your coverage.
Alternatively, for larger areas you can always apply two coats of primer, making sure that each coat is given plenty of time to dry between applications. Always use high quality roller covers as these will minimize splatter and give you better coverage.
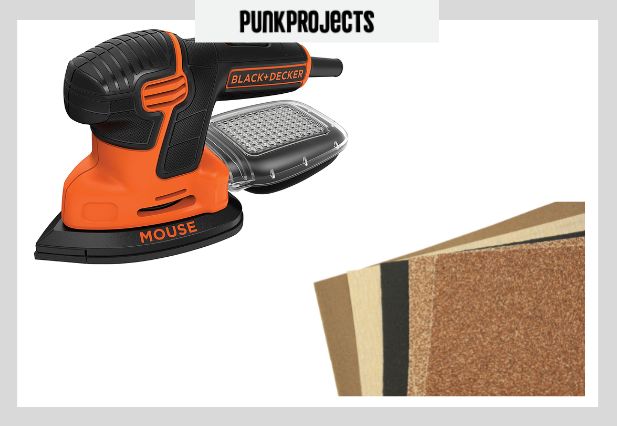
Another method to reduce streaks and make your walls look more attractive is to use sandpaper over recently applied primer.
First, give your primer plenty of time to cure (at least 24 hours). Then take light grit sandpaper and lightly sand away any paint streaks or blobs for a smooth finish.
Nervous about damaging the wall? Use an electric sander if necessary however keep in mind that excessive pressure can lead to splintering or scratching which will make reapplying the wall even more difficult in future!
How Many Coats of Primer
When painting, two or more coats are necessary for proper protection and coverage with many instances requiring three or more layers. For example, when painting drywall it may take three layers before adequate coverage is achieved. This includes priming with a high-quality sealant such as oil-based Kilz Plus. The number of coats necessary always depends on the coating being applied and on the condition of the surface being painted – not every project will require multiple coats of primer.
In general, two or three coats are necessary for priming most surfaces. On previously painted surfaces one thick coat should be adequate if a high quality sealant was used before.
Is Primer Supposed To Be Watery
As a rule, primer should have a thick and creamy consistency that applies easily with a brush or roller. Generally speaking, it should not be runny or watery, as this could cause uneven application and poor adhesion to the surface.
Some primers may have small amounts of texture or air bubbles as part of their properties, which is perfectly normal and does not affect their performance. However, excessive streaking could be an indication that the primer has been stored improperly or is watered down. It is therefore important to always check the product before applying it and follow the manufacturer’s instructions for optimal results.
Primer vs Two Coats Paint
The difference between a properly prepared wall with primer and two coats of paint versus just a single coat of paint lies in the details. Primers provide an optimal surface for the topcoat coats to stick and protect the paint job, whereas two topcoats can look great over a prepared surface but can be prone to bubbling and streaking depending on the application techniques used.
Primer helps ensure even color across your walls and provides long-term durability. It also helps reduce brush marks, streaks, and lap lines by filling in any imperfections that may be present in your walls prior to painting.
How is Primer Supposed to Look
For best results, choose an appropriate primer for your surface, and correctly clean and prepare the surface before applying primer; this will ensure better coverage. Depending on the type of material being primed, different methods of application are usually required; many primers can be applied with brushes, rollers or spray guns but some require specialized installation techniques.
The manufacturers’ directions should be followed closely in order to achieve a good finish. As a general rule of thumb, two coats are necessary for better bonding and longer lasting protection against moisture damage or UV fading.
How Many Coats of Primer Over Dark Paint
When applying primer to a wall, the number of coats will depend on several factors. One important consideration is the color of your existing paint and how dark it is. Generally speaking, lighter colors (white and off-white) do not require as many coats of primer as darker colors (red, blue, etc.).
This is especially true if you are painting over an existing dark paint. In such cases, two coats of primer may be necessary to adequately cover the underlying color. However, if the existing paint is light and you are priming for a new coat of paint in a different color, one or two thin coats should be sufficient.
It’s also important to take into account whether you’re using an oil-based or water-based primer as these can have different effects. Oil-based primers tend to dry with a streaky effect that needs to be corrected with additional layers for even coverage; however this should not occur with water-based primers unless they have not been applied correctly. So no matter which kind of primer you use, make sure that each coat is evenly applied before adding extra layers if needed.
Do I Need Two Coats of Paint If I Use Primer
Regardless of the paint or primer you use, you should always apply at least two coats of either product to achieve optimal results. Many experts recommend two coats of “good” primer as a base layer to typically get a better finish and long-lasting results. When it comes to primers, it is recommended that you go with a quality product that contains higher percentage solids and is designed for whatever surface it is being applied to.
How Do I Know If My Primer is Enough?
If your first layer of primer looks streaky, then apply a second layer to give full coverage and an even finish. Make sure each coat of primer dries completely before adding on more. And be sure to use the appropriate brush for applying primer; a brush size similar to the area it will be painting will help ensure that each coating is spread properly and even.
You can also test for even coverage by running your hand across the surface after applying the primer – if you can still feel texture from the original surface beneath your hand, then there may not be enough coverage and you may need to apply another coat.
In addition, check for any obvious gaps or areas of lightness; if they persist after two coats of primer they are most likely still present and in need of further attention before continuing with any painting projects.
Does Primer Need To Be Streak Free?
The application of primer is an important step in any painting project. The purpose of primer is to provide an even, level base for paint to adhere to, and it can also help ensure a longer-lasting finish. For these reasons, it is recommended that primer be applied as smoothly and evenly as possible.
When you have properly primed the surface, it should have a smooth and even look with no visible streaks or brush marks. This can be achieved by using appropriate primers that are best suited for the specific substrate (surface) you are priming; suitable Primer must block stains, adhesion should be good, protecting surface before paint application.
Frequency Ask Question
Which Tools To Use To Apply Primer: Brush Or Roller?
When it comes to applying primer evenly and getting the desired look, the type of tool you use can make all the difference. While it is possible to apply primer with a brush or roller, each tool has its pros and cons. Understanding both can help you determine which is best for your project.
Brushes: Primers can be applied with a brush, although this method does require more skill and expertise. Brushes are better for tight spaces and edges, as well as textured surfaces where a roller may not lay down even coats.
Rollers: Rollers are typically easier to use than brushes when it comes to painting large flat surfaces at once; they allow user to apply nicer thicker coats than an-application with a brush typically would allow. This helps create an even finish without gaps or streaks commonly found when using a brush alone.
How Long Does Primer Dry?
To determine when your primer is completely dry, look for changes in its appearance. Water-based primers tend to streak slightly when they’re still wet but will become opaque and even in color when they’re fully cured.
Solvent-based primers will become glossy when completely cured while sealer type primers may look thinner and more translucent when they are ready for paint. Lastly, some formulas may also form a very thin surface film after completely dried which indicates that it’s ready for painting over top of it with minimal sanding required afterwards. or you can see the guide how long you can leave primer unpainted.
I am a multi-talented designer and contractor with over 10 years of experience in the field. I have a passion for creating beautiful, innovative spaces that reflect my clients’ needs and styles. My skills include architectural design, interior design, space planning, project management and construction supervision.
Related Post
 7 Alternatives for Plywood (Lightweight & Strong)
 Sherwin Williams Cashmere vs Emerald (Pros & Cons)
 How Long Can You Leave Primer Unpainted (Guide)
 Types of Clamps for Hoses (Applications & How To Remove)
 Home Remodeling 101: Transforming Your Space Into Your Dream Home
 The Benefits of Using Aluminum Material for Your Home (Strength and Style)